

Click Here for Free Bodybuilding and Fitness Magazine Subscription
Hardest Bodyweight Exercises
Build Muscle Without Weights
Mike Thiga transformed himself from a scrawny 148 pounds to a massive 187 pounds. In slightly less than 6 months, he packed on 39 pounds of solid muscle, all without ever lifting a weight or going to the gym. Learn how he did it in The Muscle Experiment: Lost Secrets Of Bodyweight Training For Muscle Mass
Hardest Bodyweight Exercises That Build Muscle
Hardest Bodyweight Exercises That Build Muscle
By Mike Thiga author of The-Muscle-Experiment.com
Bodyweight training is one of the most effective ways to develop a strong, flexible, functional physique without the need for external weights or equipment. Through mastering difficult bodyweight exercises, athletes build impressive strength, balance, endurance, and coordination. Among numerous challenging bodyweight movements, certain exercises have become benchmarks of true strength and skill. Each movement offers unique benefits, challenges different muscle groups, and demonstrates superior physical ability. In the following sections, we'll explore these hardest bodyweight exercises in detail, their benefits, proper technique for execution, and recommendations for progression.
Handstand Push-Ups
Overview and Benefits
The handstand push-up is a powerful upper body exercise that dynamically targets the shoulders, chest, triceps, core, and stabilizing muscles. Handling the majority of your bodyweight overhead, it requires exceptional shoulder strength, stability, balance, coordination, and core control.
Performing handstand push-ups regularly can substantially increase overall upper-body strength, enhance your overhead pressing power, and dramatically improve your proprioception and balance skills.
Technique and Execution
- Begin by kicking or pressing yourself into a stable handstand position against a wall (initially) for support. Hands should rest firmly on the floor, shoulder-width apart.
- Engage your core and glutes, keeping your entire body straight and rigid.
- Slowly lower yourself down by bending your elbows, keeping your head between your hands and arms until your head gently contacts the ground. Elbows should remain relatively tucked rather than flared.
- Press forcefully back upward through your shoulders, triceps, and upper chest, returning to an extended elbow position with full control.
Progression Tips
- Start by mastering the standard handstand hold against a wall. Build endurance in this position.
- Progress by working on negative repetitions (eccentric-only repetitions) slowly lowering yourself.
- Gradually develop strict pressing strength by performing pike push-ups or deficit push-ups before attempting the full movement.
- Eventually, work towards performing this exercise freestanding without wall support for ultimate mastery.
Pistol Squats
Overview and Benefits
The pistol squat, an advanced single-legged squat, provides immense benefits in lower-body strength, balance, flexibility, and joint stability. It targets major muscle groups in the legs including quadriceps, glutes, hamstrings, calves, and even recruits significant ankle and hip stability.
Because pistol squats involve intense balancing on one leg, they challenge coordination skills and engage the stabilizing muscles around the knee, hips, and ankles extensively-strengthening these joints and reducing risk of injury in daily movements or sports.
Technique and Execution
- Start standing upright, balanced on one leg with the other extended straight out in front of you.
- Keep your chest upright, core braced, and refuse to let your spine curve excessively.
- Slowly descend by pushing your hips back first and then bending your knee.
- Aim to lower all the way down until your thigh contacts your calf or just above your ankle. Meanwhile, your extended leg does not touch the ground.
- Drive through your heel powerfully, engaging your glutes and quadriceps, pressing yourself back upwards to a fully standing position.
Progression Tips
- Improve your mobility and flexibility first, particularly ankle dorsiflexion and hamstring flexibility, essential for smooth pistol squats.
- Begin practicing assisted pistol squats by holding onto walls, chairs, or other supports.
- Perform controlled negatives or partial range repetitions first (squatting to a chair or box), gradually lowering depth over time.
- Integrate unilateral strength exercises such as lunges and Bulgarian split squats to help build strength, balance, and confidence before approaching full pistol squats.
Vertical Bodyweight Tricep Extensions
Overview and Benefits
Vertical bodyweight tricep extensions, or overhead tricep extensions using bodyweight, dramatically target the triceps muscles with high intensity. This movement greatly develops triceps strength, definition, and elbow joint stability. Unlike traditional push-ups, this demanding exercise isolates the triceps to engage them far more intensely.
Technique and Execution
- Position yourself facing a sturdy surface such as a wall, ledge, or elevated bar.
- With hands placed approximately shoulder-width apart, assume a plank-like position standing further away from the surface, leaning your entire body weight forward onto your arms.
- From an extended-arm starting position, carefully lower your torso toward the surface by bending at the elbows only, keeping your elbows narrow and close together.
- Once you reach maximal depth (usually until your elbows hit roughly a 90 degree angle), powerfully extend your elbows by contracting your triceps muscles, pressing yourself back up to the initial extended-arm position.
Progression Tips
- Start with a higher surface to reduce the angle of resistance, allowing progressive entry into the difficulty of this movement.
- Slowly increment difficulty by gradually decreasing the height of the surface, bringing your body angle closer to horizontal.
- Maintain tight form and controlled tempo-avoid explosive or uncontrolled movements to minimize risk of injury.
- Eventually, very advanced athletes might even attempt near-horizontal progression, becoming even closer to a full-body tricep extension similar to a strict-ring tricep extension.
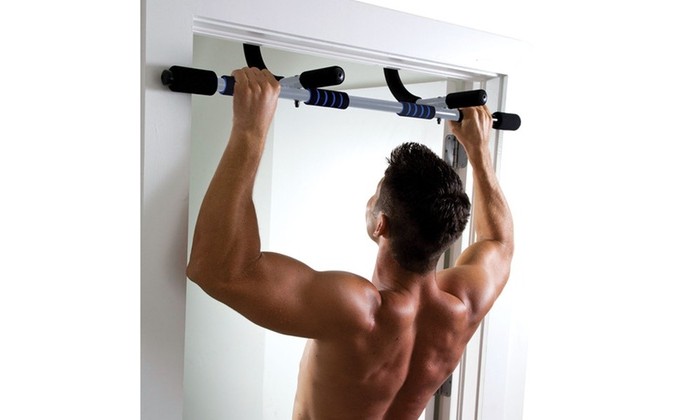
Pull-Ups
Overview and Benefits
The pull-up is a foundational-and yet extremely controllable-upper-body exercise designed to effectively build strength in the back, lats, biceps, forearms, shoulders, and core. Requiring significant pulling strength, shoulder stability, grip endurance, and full-body tension, pull-ups remain integral for serious bodyweight practitioners. The traditional pull-up is demanding enough-developing true pulling strength-but the progression toward exceptionally difficult variations, such as muscle-ups or one-arm chin-ups, elevates even more impressive mastery levels.
Technique and Execution
- Grasp a pull-up bar with an overhead grip at roughly shoulder-width apart.
- Engage the shoulders by retracting and depressing the scapula, engaging and activating lats.
- Keep your core braced and legs hanging together or slightly bent backward (known as the "hollow body" pull-up position).
- Pull yourself straight upward using primarily your back and arms muscles, squeezing shoulder blades together.
- Reach full height, chin clearly above the bar, and slowly lower yourself under full muscular control back into a dead hang position.
Progression Tips
- Start with assisted pull-ups or band-assisted versions to gradually strengthen necessary muscles.
- Use negative pull-ups from the top position slowly lowering yourself over time for additional eccentric strength development.
- Work towards more challenging pull-up types (wide, close-grip, weighted) to develop targeted skills, eventually attempting one-arm progressions as summit challenges.
One-Arm Push-ups
Overview and Benefits
Few exercises exhibit raw upper body power, stability, and overall kinetic control quite as distinctly as the one-arm push-up. They challenge virtually every muscle group in the upper body-shoulders, chest, triceps, core stabilizers and even lower back-with enormous intensity. The one-arm push-up not only tests sheer strength but also coordination, balance, body awareness, and symmetry.
Technique and Execution
- Adopt a standard push-up position but widen your feet substantially for stability balance.
- Bring your supporting hand directly under or slightly inward closer to your midline beneath your shoulder.
- Place the opposite arm either by your side, behind your back, or tucked tightly behind the thigh.
- Lower your body with balance and control, maintaining tight core engagement and avoiding torso rotation or dropping one side uncontrollably.
- Once your chest approaches or touches the ground, drive forcefully upward, returning to the initial extended-arm position while maintaining flat and parallel shoulders.
Progression Tips
- Begin practicing with a high surface inclined one-arm push-ups; as your strength grows, decrease the surface height gradually.
- Work on standard push-ups with narrow hand positioning and increased repetitions first.
- Perform negatives (slow lowering eccentric-only exercises) with additional focus on whole-body bracing to prime joints for controlling stiffness.
- Eventually, mastering proper one-arm push-up positioning with evenly distributed workload increases your muscular control immensely.
Each exercise uniquely challenges the limits of strength, stability, and control, providing incredible benefits for athletes aiming high in their physical capabilities. By systematically progressing through exercises and building proper technique, anyone dedicated can eventually gain mastery of these difficult-but extremely rewarding-movements.